
Cart
0
Introduction: Meals Are Part of Your Gear
This time, let’s talk about food.
When you’re aiming for a lightweight setup in the mountains, many hikers measure their base weight—the pack weight excluding consumables like water, food, and fuel.
But have you ever thought about the weight of your food?
Food is one of the joys of being in the mountains.
It’s natural to want delicious meals, but if you get too indulgent, your pack becomes heavy in no time.
I once packed retort curry, pasta sauce, and alcohol for a four-day, three-night hike.
The food alone weighed around 3 kg.
I completed the trip as planned, but along the way my stomach got upset, my appetite disappeared, and I was tormented by the weight of the uneaten food.
That experience made me start thinking about creating a “light yet satisfying meal system.”
Here, I’ll introduce the lightweight meal setup I actually use on summer tent trips.
This isn’t the only correct way—just one approach. Feel free to take it as a reference.

Point 1: Reduce the Number of Times You Use Your Stove and Fuel
“The number of times you boil water determines how light your setup is.”
On my trips, I use my stove twice a day—only morning and evening.
During the day, I rely on snacks or light meals at mountain huts.
Reducing the number of cooking sessions is one of the fundamentals of going light.
It not only saves fuel consumption but also reduces the amount of fuel you need to bring.
As we’ll see later, when using solid fuel or an alcohol stove, careful planning—bringing exactly what you need—directly translates to less weight.
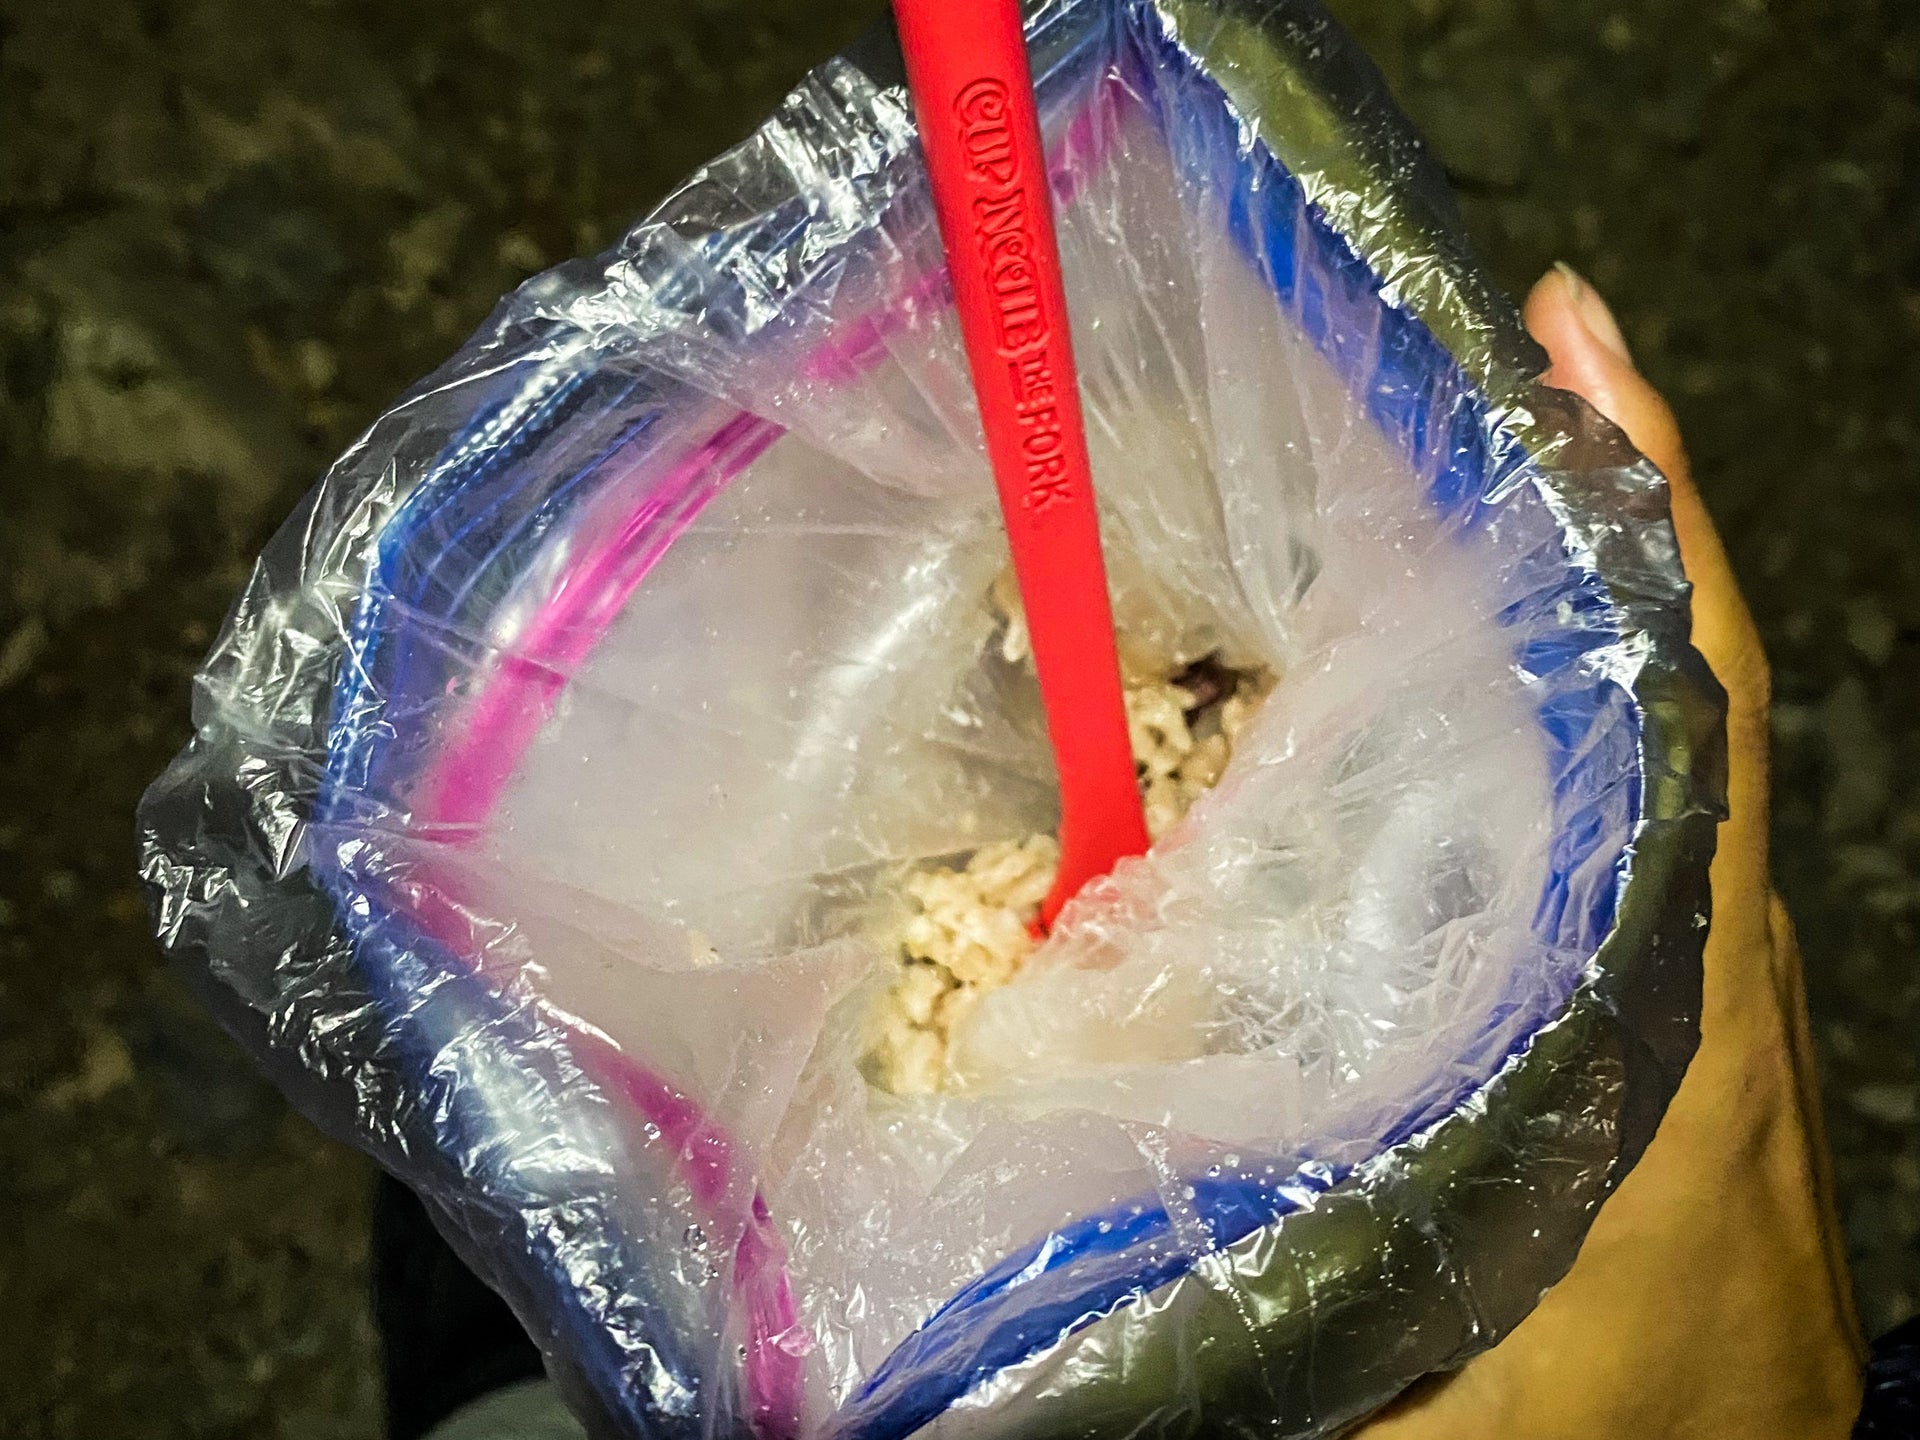
Point 2: Repackage Meals into Wrap Bags
“Lighter, smaller, and easier to clean up.”
For main meals, I use the classic freeze-dried rice as a base.
I open each package and transfer the contents into wrap bags.

11g including the package and the attached spoon
Wrap (by Iwatani Material) is a gusseted polyethylene bag that can withstand boiling water.
They’re available in several types and can be bought at supermarkets or drugstores.
Since you can’t tell which meal is which afterward, it’s handy to label the bags with masking tape—note the flavor and required amount of hot water.

I include just one extra spoon as a backup
This simple step makes packing much easier.
Packaging takes up more space than you’d think, and repacking minimizes post-meal trash—keeping your backpack neat and tidy.
Point 3: “Just Right” Feels Best
“Choose a cooker that’s sufficient, not excessive.”
Each meal needs roughly 160–300 ml of hot water.
That’s enough to prepare rice plus soup or coffee.
I use the Evernew 400FD—small, but perfectly adequate.
Even on a recent South Alps trip, I didn’t feel inconvenienced.

In the mountains, “bigger is better” doesn’t apply.
Choosing a just-enough size is key to lightness.
The result is a simpler cook set and storage system that packs beautifully and feels satisfying.
Point 4: Lightness Begins with Fuel
“Graduate from gas canisters.”
Revising your fuel source has a major impact on overall weight.
Even the smallest gas canister (110 size) weighs over 100 g when empty.
For example, on my South Alps trip:
-
My stove boiled 300 ml of water using 15 ml of alcohol.
-
I used 15 ml × 2 = 30 ml per night (morning + evening).
-
For three nights → 30 ml × 3 = 90 ml, plus a reserve → 120 ml total.
-
Including the bottle: 130 g total.
Switching from gas to alcohol saved about 100 g.
Gas is more convenient, but unless you need to minimize every second of boil time, alcohol is more than enough.
Point 5: Use a Thermal Cozy for Warmth and Efficiency
“The unsung hero of light yet tasty meals.”
Ever found your freeze-dried rice a bit undercooked or firm in the middle?
That’s where a thermal cozy comes in handy.
I use it not just to keep food warm but to ensure even rehydration.
Pour hot water into the wrap bag, seal it, and place it—bag and all—into the cozy.
While it rehydrates, you can prepare soup or drinks and save fuel.

A long-handled spoon pairs best with this system—it’s easier to eat from the bag.
I often use freeze-dried rice, but anything rehydratable works—instant curry rice, soy meat, or dried vegetables are great for personal customization.
I like cozies a lot, so I have several types:
-
A standing cozy made from Tyvek + Astrofoil
-
An HMG Re-Pack with Thinsulate insulation
-
A 500 ml deep Iwasaki Industry screw-top keeper

The label shows the total weight including a Ziploc bag (size S)
For the South Alps trip, I prioritized weight and used the standing cozy, but my favorite is the screw-top keeper.
Originally a food storage container, it’s sturdy, easy to hold, and doubles as a bowl for soups.
Its tall shape fits nicely in side pockets, so it’s also good for fragile trail snacks like nuts.
The silver insulating cover is DIY—made from a 100-yen-store reflective sheet (the same kind used for bath covers).
These containers cost only a few hundred yen, making them very cost-effective.
Repurposing everyday items as mountain gear is another key to going ultralight.
Summary: Discoveries Hidden in Lightness
To summarize, here are the five key points of this meal system:
-
Reduce the number of times you use your stove and fuel
-
Repackage meals into I-Wrap bags
-
“Just right” feels best
-
Lightness begins with fuel
-
Use a thermal cozy for warmth and efficiency
Adopting even one of these will make your meal system noticeably lighter.
On my South Alps trip, the total food weight for four days and three nights was about 1.8 kg—roughly half of what it used to be.
Of course, lightness brings some inconvenience,
but that inconvenience can spark new ideas and help refine your personal style.
To me, lightening your load isn’t about sacrifice—it’s redefining comfort.
I’d be glad if that perspective resonates with you.
Meals, too, are an essential part of your gear.
If you’ve read this far, take a moment to reexamine your own meal system.

